Widget是一个更好的工具,可以将内容插入或编辑到CMS页面块或页面中,所以我很高兴为您带来Magento 2中的Create Widget主题。阅读这篇文章将有助于您理解:“ Magento 2中有哪些小部件?“和”如何在Magento 2商店使用它们“。通过简单的指令,可以轻松地在Magento 2中自定义新的小部件。
表内容
- Magento 2中的小部件是什么?
- 如何在Magento 2中创建小部件
- 第1步:声明小部件
- 第2步:创建窗口小部件模板文件
- 第3步:创建小部件Block类
- 第4步:刷新缓存和帖子
Magento 2中的小部件是什么?
首先,我们都将访问Magento 2中的Widget。
小部件是Magento 2配置中的强大功能。作为商店管理员,您可以利用小部件来改善生动界面下的店面。小部件允许显示静态信息或动态内容营销。我想说明一些Magento小部件的实现,例如:
- 动态产品数据
- 最近查看的产品的动态列表
- 促销横幅
- 交互式导航元素和动作块
- 插入内容页面的动态Flash元素
Magento 2中小部件的自定义类似于使用简单模块的优化前端扩展。它是很容易创建的Magento 2插件?绝对是的,因为这与创建helloworld时的情况相同,除了一些额外的文件。因此,尽管您拥有任何技术经验,但通过动态内容块可以轻松改善您的店面。
如何在Magento 2中创建小部件?
在Magento 2中创建小部件的4个步骤
- 第1步:声明小部件
- 第2步:创建窗口小部件模板文件
- 第3步:创建小部件Block类
- 第4步:刷新缓存和帖子
第1步:声明小部件
etc/widget.xml使用以下内容创建文件
<?xml version="1.0" ?>
<widgets xmlns:xsi="http://www.w3.org/2001/XMLSchema-instance" xsi:noNamespaceSchemaLocation="urn:magento:helloworld:Magento_Widget:etc/widget.xsd">
	<widget class="Mageplaza\HelloWorld\Block\Widget\Posts" id="mageplaza_helloworld_posts">
		<label>Blog Posts</label>
		<description>Posts</description>
		<parameters>
			<parameter name="posts" sort_order="10" visible="true" xsi:type="text">
				<label>Custom Posts Label</label>
			</parameter>
		</parameters>
	</widget>
</widgets>
第2步:创建窗口小部件模板文件
文件: view/frontend/templates/widget/posts.phtml
<?php if($block->getData('posts')): ?>
	<h2 class='posts'><?php echo $block->getData('posts'); ?></h2>
	<p>This is sample widget. Perform your code here.</p>
<?php endif; ?>
第3步:创建小部件Block类
创建块文件: Block/Widget/Posts.php
<?php
namespace Mageplaza\HelloWorld\Block\Widget;

use Magento\Framework\View\Element\Template;
use Magento\Widget\Block\BlockInterface;

class Posts extends Template implements BlockInterface {

	protected $_template = "widget/posts.phtml";

}
第4步:刷新缓存和帖子
- 你应该刷新Magento缓存,阅读本教程:Flush Magento缓存
- 发布帖子。
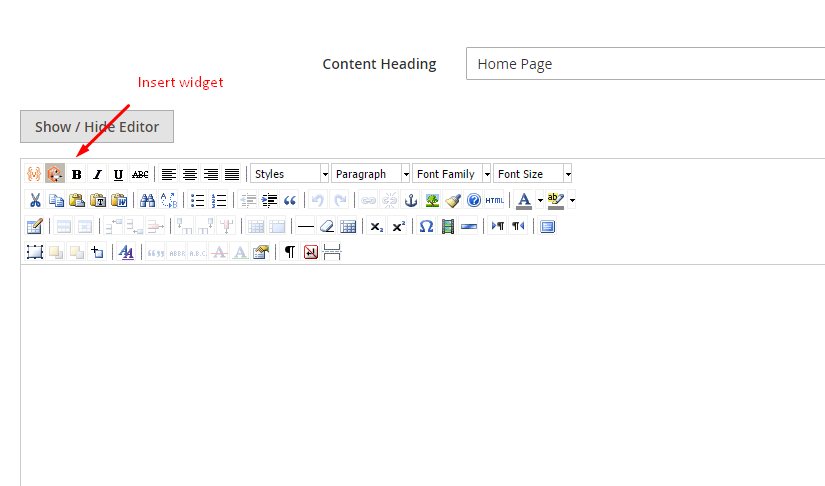
去 admin panel > Content > Pages > Home page > Edit
在Content选项卡中,单击Insert Widget图标

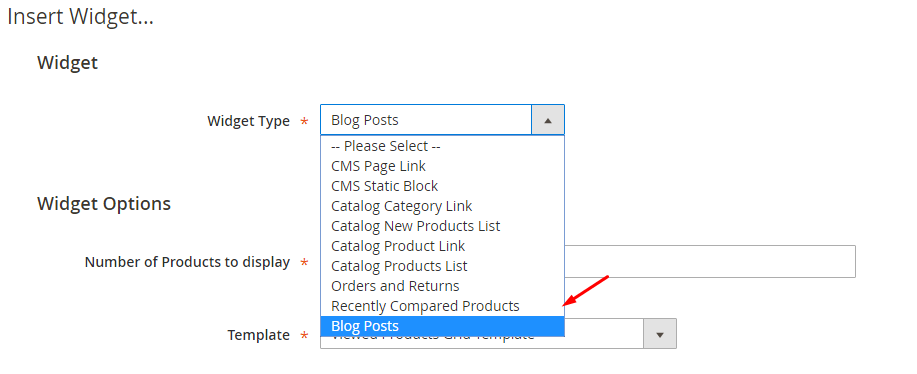
您将看到Blog posts小部件列表

